Start, Login, and User Profile
Start
Start Security Suite by double clicking on the icon ![]() and entering the administrative credentials to ensure processes execute with the necessary permissions on the installed host.
and entering the administrative credentials to ensure processes execute with the necessary permissions on the installed host.

View the MAIN MENU and select the option for how you want to run this installation. These options allow you to start the product in a number of different ways, to support environments as diverse as standalone installations, network-based shared environments, or distributed multi-node architectures. See the Administrator Guide for a complete description for all of these options, as well as detailed instructions on how to setup and configure the software for various types of environments.
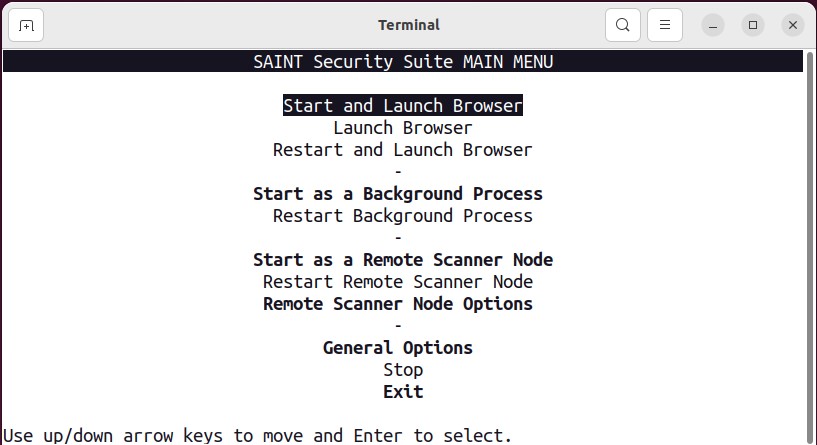
The following describes starting SAINT Security Suite from the MAIN MENU:
-
Start and Launch Browser – This is the most typical startup option for users that run the product from the installed host, such as from a desktop or laptop installation, or using the product directly on a server. When you close the browser, the background processes will continue to process scan requests until you choose to “stop” the software or restart or shut down the host machine. If Security Suite is currently running in background from a previous startup action, the only step required is to Launch Browser.
-
Start as a Background Process – This option is typically selected when the software is installed on a shared resource, with user access done remotely via a desktop browser, using the localhost’s URL. This option starts all processes but does not open a browser on the installed host. Processes will remain open until a decision is made to “stop” the software or the installed host is rebooted or shutdown.
-
Start as a Remote Scanner Node – This option starts the software on the installed host, and makes a secure connection to a separate installation that acts as a “manager” to support multi-node and load balanced scan requirements. This process requires additional installation and configuration actions by the system administrator, as described in the Administrator’s Guide.
NOTE: The default startup option is to Start and Launch Browser. However, the default option is updated automatically for subsequent start processes based on the selection made through this menu.
Login
User account and Password credentials are case sensitive. Each installation comes pre-bundled with a default login account with administrative permissions to fully configure and administer the system. It is recommended that each user be given their own unique user account for ease of administration and user access control.
User Profile
Each user account contains a profile that stores information such as the user ID; access controls and permissions to system features and content; work address and e-mail address (to support automated notifications and report delivery workflows). Additionally, it includes and features that provide each user with some level of customization to the system. An example of a user Profile Settings screen is shown below:
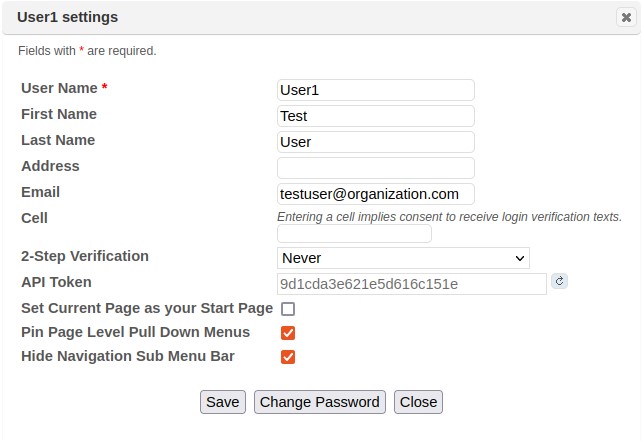
The Profile Settings button is located under the User icon displayed in the top right corner of the application alows you to access your profile information. Each user has write permission to edit the personal information related to the profile, configure system type configurations contained in this dialog; and the ability to change their password.
Change Password
Changing your password is done through the Profile Settings, or by contacting your Administrator. Follow these steps to change your password without Administrator assistance:
-
Open the Profile Settings button under the User icon displayed in the top right corner of the application.
-
Select the Change Password button (Note: If the password button is grayed out, that means your account uses an authentication type which doesn’t use locally stored passwords, such as Active Directory. In this case, the password would need to be changed from the Windows domain. See Create a User for more information.)
-
Enter your current password in the Current Password field to verify your identity
-
Enter your new password in the New Password field
-
Enter the new password again in the Confirm New Password field
-
Click Save
-
Close the dialog
Two-Step Verification
Although passwords are generally an accepted way of authenticating users, the use of passwords alone cannot prevent unauthorized access if a password is guessed or stolen. For increased security, users may add an additional layer of security to their accounts by enabling a two-step verification process. This process requires the user to have both the correct password and the correct cell phone for the account in order to be granted access to the system.
To enable two-step verification:
-
Click on the Profile link at the top right of any screen in the application.
-
In the cell setting, enter your cell phone number, including area code.
-
In the 2-Step Verification setting, choose one of the following options:
-
Always – Require a login, password, and cell phone verification every time you log in.
-
When logging in from new location – Require a login, password, and cell phone verification only when you log in from a new IP address. When you log in from an IP address from which you have logged in before, require only a login and password.
-
Never – Require only a login and password.
-
-
Click on the Save button.
To use two-step verification once it is enabled:
-
At the login screen, enter your login and password.
-
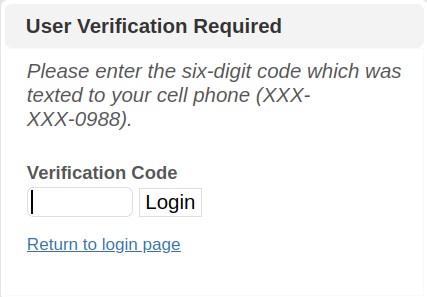
If two-step verification is required from your location, you will see the following prompt. (The prompt shows the last four digits of your cell phone number. If this is not the correct number, contact your system administrator.)
-
Wait for a new text message to arrive from SAINT on your cell phone. The text message will contain a six-digit numeric code. (A new text message is sent each time you get to this step. Ensure you read the current message, since previous codes will not be accepted.)
-
Enter the code at the prompt.
-
Click on the Login button.
Set Default Start Page
Each user has control over what default page is displayed upon login. For example, one user may want to have the Dashboard tab displayed by default; while another user may want the Report tab to be the default. To set the default page:
-
Navigate to the page you want to be displayed by default when you log in
-
Click on the Profile Settings button under the User icon in the top right corner of the application.
-
Select the checkbox for the “Set Current Page as your Start Page” option
-
Click Save
-
Close the dialog
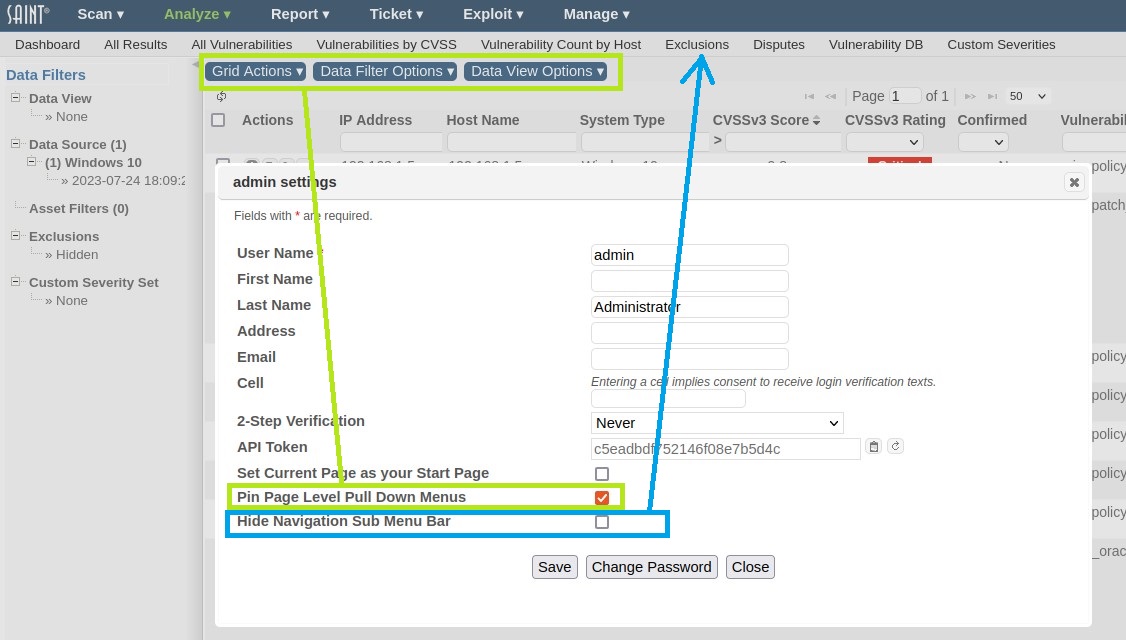
Pin Page Level Pull Down Menus
By the default, the Action options applicable to each page have a static position on each page, and scroll along with all other content as you scroll the pages up and down. This option provides the capability to set the Actions menu bar to be pinned to the top-level menu bar, retaining visibility as you scroll.
Hide Navigation Sub Menu Bar
By default, each main Menu option displays, for convenience, a sub-menu bar that includes all available page options for the selected menu. This 'hide' option provides the capability to hide the sub-menu navigation bar. The following ilustration shows the use of both the 'Pin' and 'Hide' options: